



Claude Code Video Editing: Build TikTok Hook Videos with ffmpeg
Use Claude Code and ffmpeg to cut vertical hook videos: normalise clips to 1080x1920, add a safe-area caption, join your product footage and batch variations.
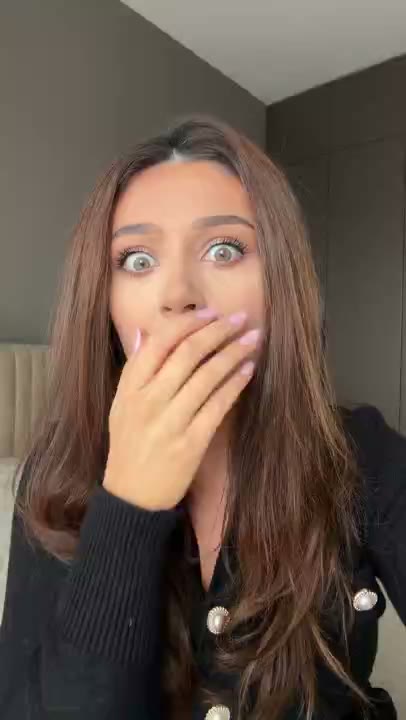
Short answer: Claude Code edits video by writing and running ffmpeg commands on your machine. For short ads that is all you need: normalise every clip to 1080×1920 at 30 fps, burn a hook caption into the top safe area, join the reaction to your product footage and check the result with ffprobe. Connect the RE/UGC MCP server and Claude can also fetch the reaction clip, so one prompt goes from brief to finished MP4.
This guide gives you the full workflow and the exact commands, explains what each flag does, and shows how to batch variations for testing. It is the command-line route: if you want the strategy side (choosing the reaction and writing the hook) start with how to make UGC ads with Claude. It assumes you are comfortable in a terminal. If you would rather edit by hand, the CapCut caption guide covers the same edit visually.
What Claude Code can and cannot do with video
Claude Code reads text and images, runs shell commands and edits files. It does not watch video. That sounds like a deal-breaker, but short-form ads are a structured edit: a known hook length, a known resolution, a caption in a known area, then your footage. ffmpeg handles every one of those steps deterministically, and Claude is good at writing and debugging ffmpeg.
| Task | Claude Code + ffmpeg | Better done by a person |
|---|---|---|
| Resize, pad and re-time clips to 9:16 | Yes, exactly and repeatably | |
| Burn in captions at a fixed position | Yes | Choosing the final wording |
| Join hook, demo and end card | Yes | |
| Batch 6–12 variations | Yes, in one loop | |
| Judge whether the reaction peaks at the right moment | Partly, from extracted frames | Yes |
| Creative cuts timed to on-screen action | Only with your timestamps | Yes |
Set up once
- Install ffmpeg: brew install ffmpeg on macOS, sudo apt install ffmpeg on Debian or Ubuntu, or the official build on Windows. Check with ffmpeg -version.
- Connect the reaction library: claude mcp add --transport http reugc https://reugc.com/mcp, then run /mcp in Claude Code to sign in. Or install the RE/UGC plugin, which adds the server and a hook-editing skill in one step.
- Make a working folder with your product footage in it, for example product.mp4, and start Claude Code there.
The AI agents setup page lists the same steps for Claude.ai, ChatGPT and n8n if your team uses more than one tool.
One prompt from brief to MP4
Copy the Claude Code prompt
Make a 9:16 hook video for [product].
Audience: [who]. Claim: [what product.mp4 proves].
1. Use RE/UGC to find 3 [shocked/relieved/laughing] reactions under 4 seconds and show me the previews. Wait for my pick. Ask before spending any credit.
2. Download the chosen clip straight away as reaction.mp4.
3. Normalise reaction.mp4 and product.mp4 to 1080x1920, 30 fps, AAC 48 kHz stereo.
4. Burn this caption into the hook, top safe area: "[caption]".
5. Join hook + product into final.mp4.
6. Report duration and resolution with ffprobe and extract 3 frames so you can check the caption placement.
Claude will pause at step 1 for your choice and again before any unlock. Everything after that runs without you. The rest of this guide is what Claude does under the hood, so you can check its work or run the steps yourself.
Step 1: Normalise every input
Clips from different sources disagree on resolution, frame rate, pixel format and audio sample rate, and ffmpeg’s fast concat only works when they match. Normalise first and the join becomes trivial.
Copy the normalise commands
norm='scale=1080:1920:force_original_aspect_ratio=decrease,pad=1080:1920:(ow-iw)/2:(oh-ih)/2,fps=30,format=yuv420p'
ffmpeg -y -i reaction.mp4 -vf "$norm" -c:v libx264 -crf 18 -c:a aac -ar 48000 -ac 2 hook.mp4
ffmpeg -y -i product.mp4  -vf "$norm" -c:v libx264 -crf 18 -c:a aac -ar 48000 -ac 2 body.mp4
- scale=…:force_original_aspect_ratio=decrease fits the clip inside 1080×1920 without stretching it.
- pad=… fills any leftover space with black bars, centred. For landscape screen recordings you may prefer a blurred background; ask Claude for the split/boxblur variant.
- fps=30,format=yuv420p gives every clip the same frame rate and a pixel format every phone plays.
- -crf 18 keeps quality high; platforms re-encode anyway, so starting clean matters more than file size.
- -ar 48000 -ac 2 makes the audio streams identical so the join does not fail.
Step 2: Add the hook caption in the safe area
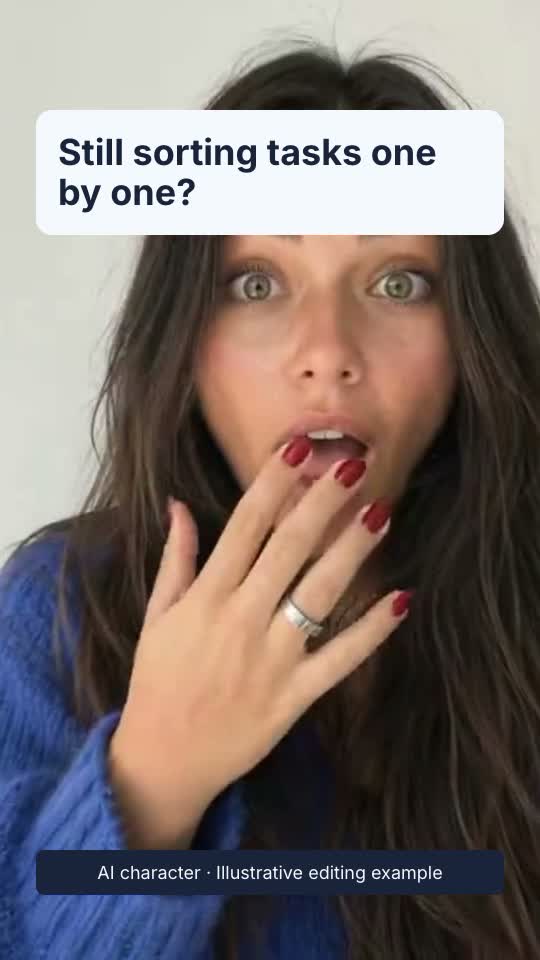
TikTok, Reels and Shorts all cover parts of the frame with buttons and captions. On a 1080×1920 frame, keep text clear of roughly the top 220 px and bottom 420 px, and inside the middle 80% of the width. A caption starting around y=260 sits in the hook zone without fighting the interface.
Copy the caption command
ffmpeg -y -i hook.mp4 -vf "drawtext=text='POV\: you finally found it':fontcolor=white:fontsize=64:borderw=6:bordercolor=black:x=(w-text_w)/2:y=260" -c:a copy hook-captioned.mp4
- Escape colons and apostrophes in the caption (\: and \'). This is the most common reason the command fails.
- On macOS, add :fontfile=/System/Library/Fonts/Supplemental/Arial Bold.ttf if ffmpeg cannot find a default font. Use your brand font file the same way.
- borderw=6:bordercolor=black gives a readable outline on any background without a box.
- For two lines, run drawtext twice with different y values rather than relying on line breaks.
Step 3: Join the hook and your footage
Copy the join commands
printf "file 'hook-captioned.mp4'\nfile 'body.mp4'\n" > parts.txt
ffmpeg -y -f concat -safe 0 -i parts.txt -c copy final.mp4
Because both parts were normalised with identical settings, -c copy joins them without re-encoding, which is fast and lossless. If a clip has no audio track, the join will fail or drop sound; add silence first with -f lavfi -i anullsrc=r=48000:cl=stereo -shortest so both parts carry matching audio.
Step 4: Check the output
Copy the checks
ffprobe -v error -show_entries format=duration:stream=width,height -of csv=p=0 final.mp4
mkdir -p frames && ffmpeg -y -i final.mp4 -vf "select='eq(n\,15)+eq(n\,60)+eq(n\,150)'" -fps_mode passthrough frames/check-%02d.png
The first command should report 1080,1920 and the total length you expect. The second saves three frames at roughly 0.5, 2 and 5 seconds. Ask Claude to look at them and confirm the caption is readable, sits clear of the face and the platform UI, and that the cut lands where you wanted.
Batch variations for testing
The real payoff of a scripted edit is variation. Once one ad works, a loop gives you every combination of reaction and caption with identical product footage, which is exactly what a clean creative test needs.
Copy the batch prompt
I own these RE/UGC clips: [id1], [id2], [id3].
Download each now (links expire in 5 minutes) and normalise them.
Captions: A = "[caption A]", B = "[caption B]".
Build every reaction x caption combination with body.mp4, named R1-A.mp4, R1-B.mp4 ...
Put them in ./variations and give me a table of file, reaction, caption, duration.
Six files from three reactions and two captions is a sensible first test. How many ad variations to test explains how to size it to your budget, and creative testing covers reading the results. For caption ideas to batch, borrow from TikTok hooks for apps, and see one product demo, five ad variations for finished examples of the pattern.
Troubleshooting
| Error or symptom | Cause | Fix |
|---|---|---|
| No such filter: 'drawtext' | ffmpeg built without libfreetype | Install a full build (Homebrew’s default ffmpeg includes it) |
| Cannot find a valid font | No default font configured | Add fontfile= with a path to a .ttf |
| Caption cut off at a colon | Unescaped : in the text | Escape it as \: |
| Concat output has no sound or stops early | One input lacks audio or differs in sample rate | Re-run normalise; add silent audio to clips without sound |
| Video plays black on iPhone | Pixel format not yuv420p | Keep format=yuv420p in the filter |
| Download fails with 403 | Link older than five minutes | Ask Claude for a new link and download immediately |
Frequently asked questions
Can Claude Code edit videos?
Yes, by running tools like ffmpeg on your computer. It cannot watch video directly, but it can extract frames to check its work, and for structured edits like vertical ads that is enough.
Do I need an MCP server to edit video with Claude Code?
No. Claude Code can run ffmpeg on files you already have. An MCP server like RE/UGC adds the ability to find and download reaction clips inside the same conversation.
Is ffmpeg good enough for TikTok and Reels ads?
For hook-plus-demo ads, yes. It produces standard H.264 MP4 files at 1080×1920 that every platform accepts. For complex motion graphics, use a dedicated editor or a code-based tool such as Remotion.
Will Claude spend RE/UGC credits without asking?
No. The server tells Claude to ask before each unlock, and Claude Code also asks for permission before running tools unless you have allowed them.
Can I use this workflow without RE/UGC?
Yes. Every ffmpeg command works with any properly licensed clip. Check the licence covers paid ads before you publish.